

Follow these steps to start sending authenticated emails with OneSignal. Dashboard configuration takes about 10–30 minutes.Documentation Index
Fetch the complete documentation index at: https://documentation.onesignal.com/llms.txt
Use this file to discover all available pages before exploring further.
Prerequisites
Before you start, make sure you have:- A OneSignal account.
- A sender email address on a domain you own (e.g.,
you@yourdomain.com). Free mailbox providers like Gmail or Outlook are not supported as sending domains. - Access to your domain’s DNS settings, either directly or through someone on your team.
Email setup steps
Follow each step to configure your email setup.Step 1: Select a provider
In your OneSignal dashboard, navigate to Settings > Set up Email. To use OneSignal Email, click Continue Setup. To use a different provider, choose one from the Optionally integrate with another email provider section: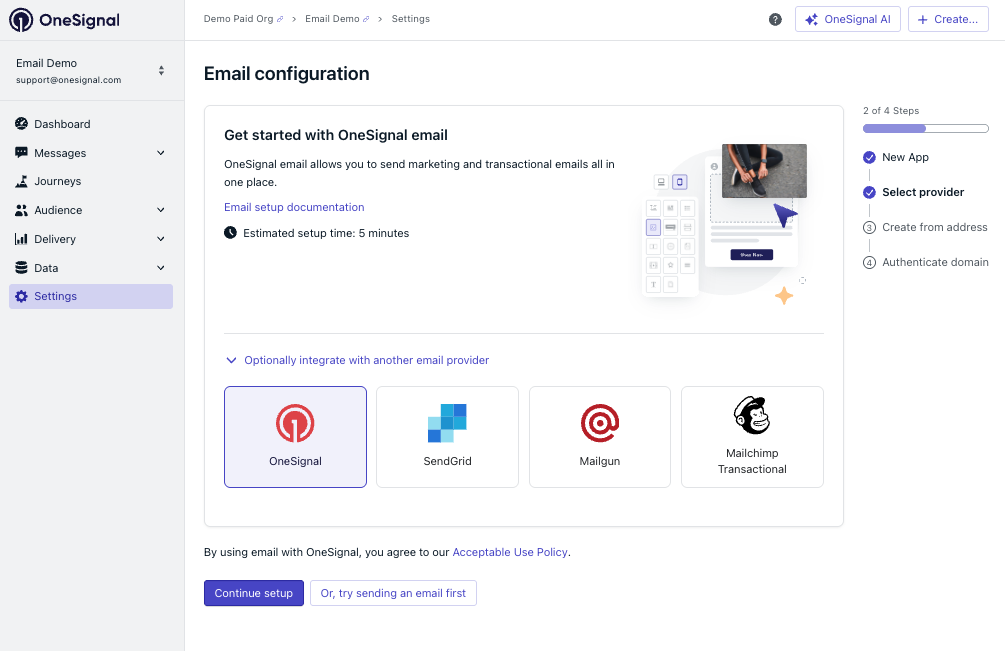
Step 2: Create a sender
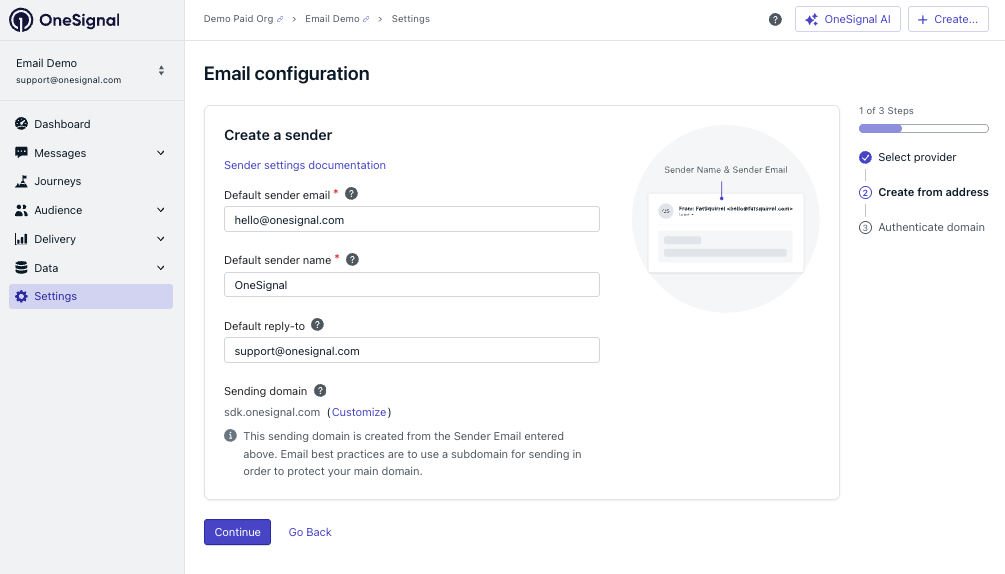
Configure the default sender identity for OneSignal to send authenticated email from your domain:- Default sender email — The from email address used when no other sender is specified (multiple senders are supported).
- Default sender name — The display name shown in the recipient’s inbox (e.g.,
Acme Team). - Default reply-to — The email address users reply to. You can override this per email.
- Sending domain — Auto-generated based on the sender email’s domain. Click Customize to use a different subdomain for DNS authentication.
Senders
Add and manage multiple senders, from addresses, reply-to addresses, and sending domains.
Step 3: Configure DNS
Configure DNS records to authenticate your sending domain. If your registrar is supported, you can Auto-Configure or add the records manually.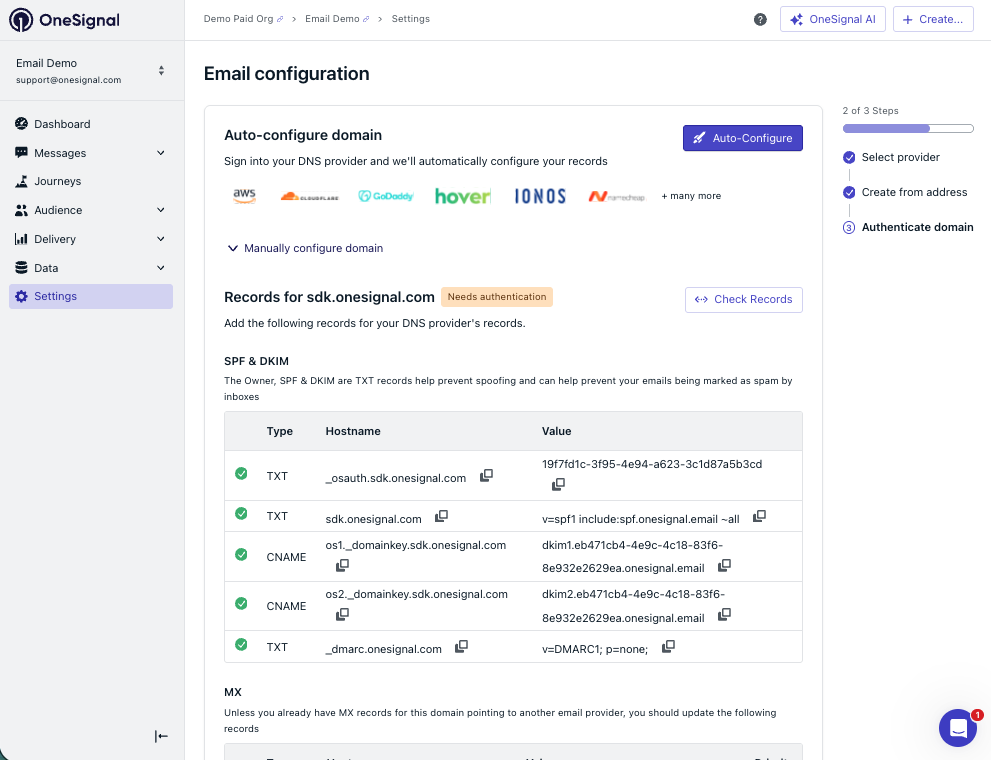
Email DNS configuration
Step-by-step guide for auto-configuring or manually adding SPF, DKIM, and DMARC records.
Step 4: Verify your account
When finished with DNS configuration, click Verify Account. OneSignal automatically reviews your domain health, sender reputation, blocklist status, and other deliverability signals to protect domain reputation and prevent abuse. Approval usually completes within a few minutes — you’ll receive an email with the results.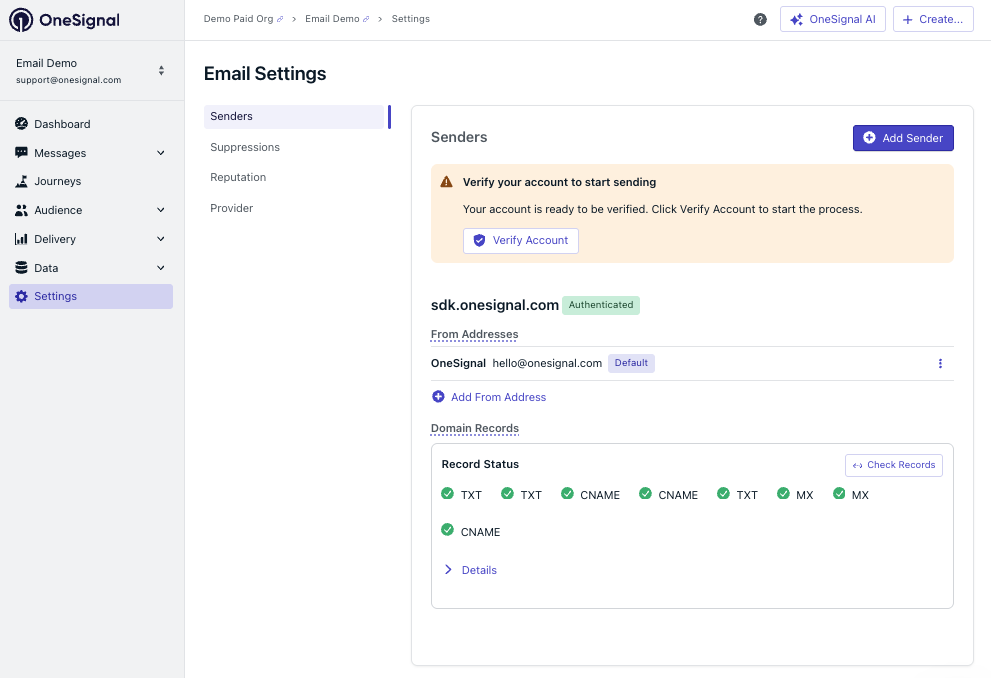
If approved, you can start sending emails to your full audience immediately!
If denied, you can review the Email domain configuration best practices for help and try again in a week.
FAQ
What is a subdomain and why should I use one?
A subdomain is a prefix added to your domain name — for example,mail.yourdomain.com is a subdomain of yourdomain.com. While your “From Address” can still appear as anything@yourdomain.com, the subdomain is used for email authentication and delivery.
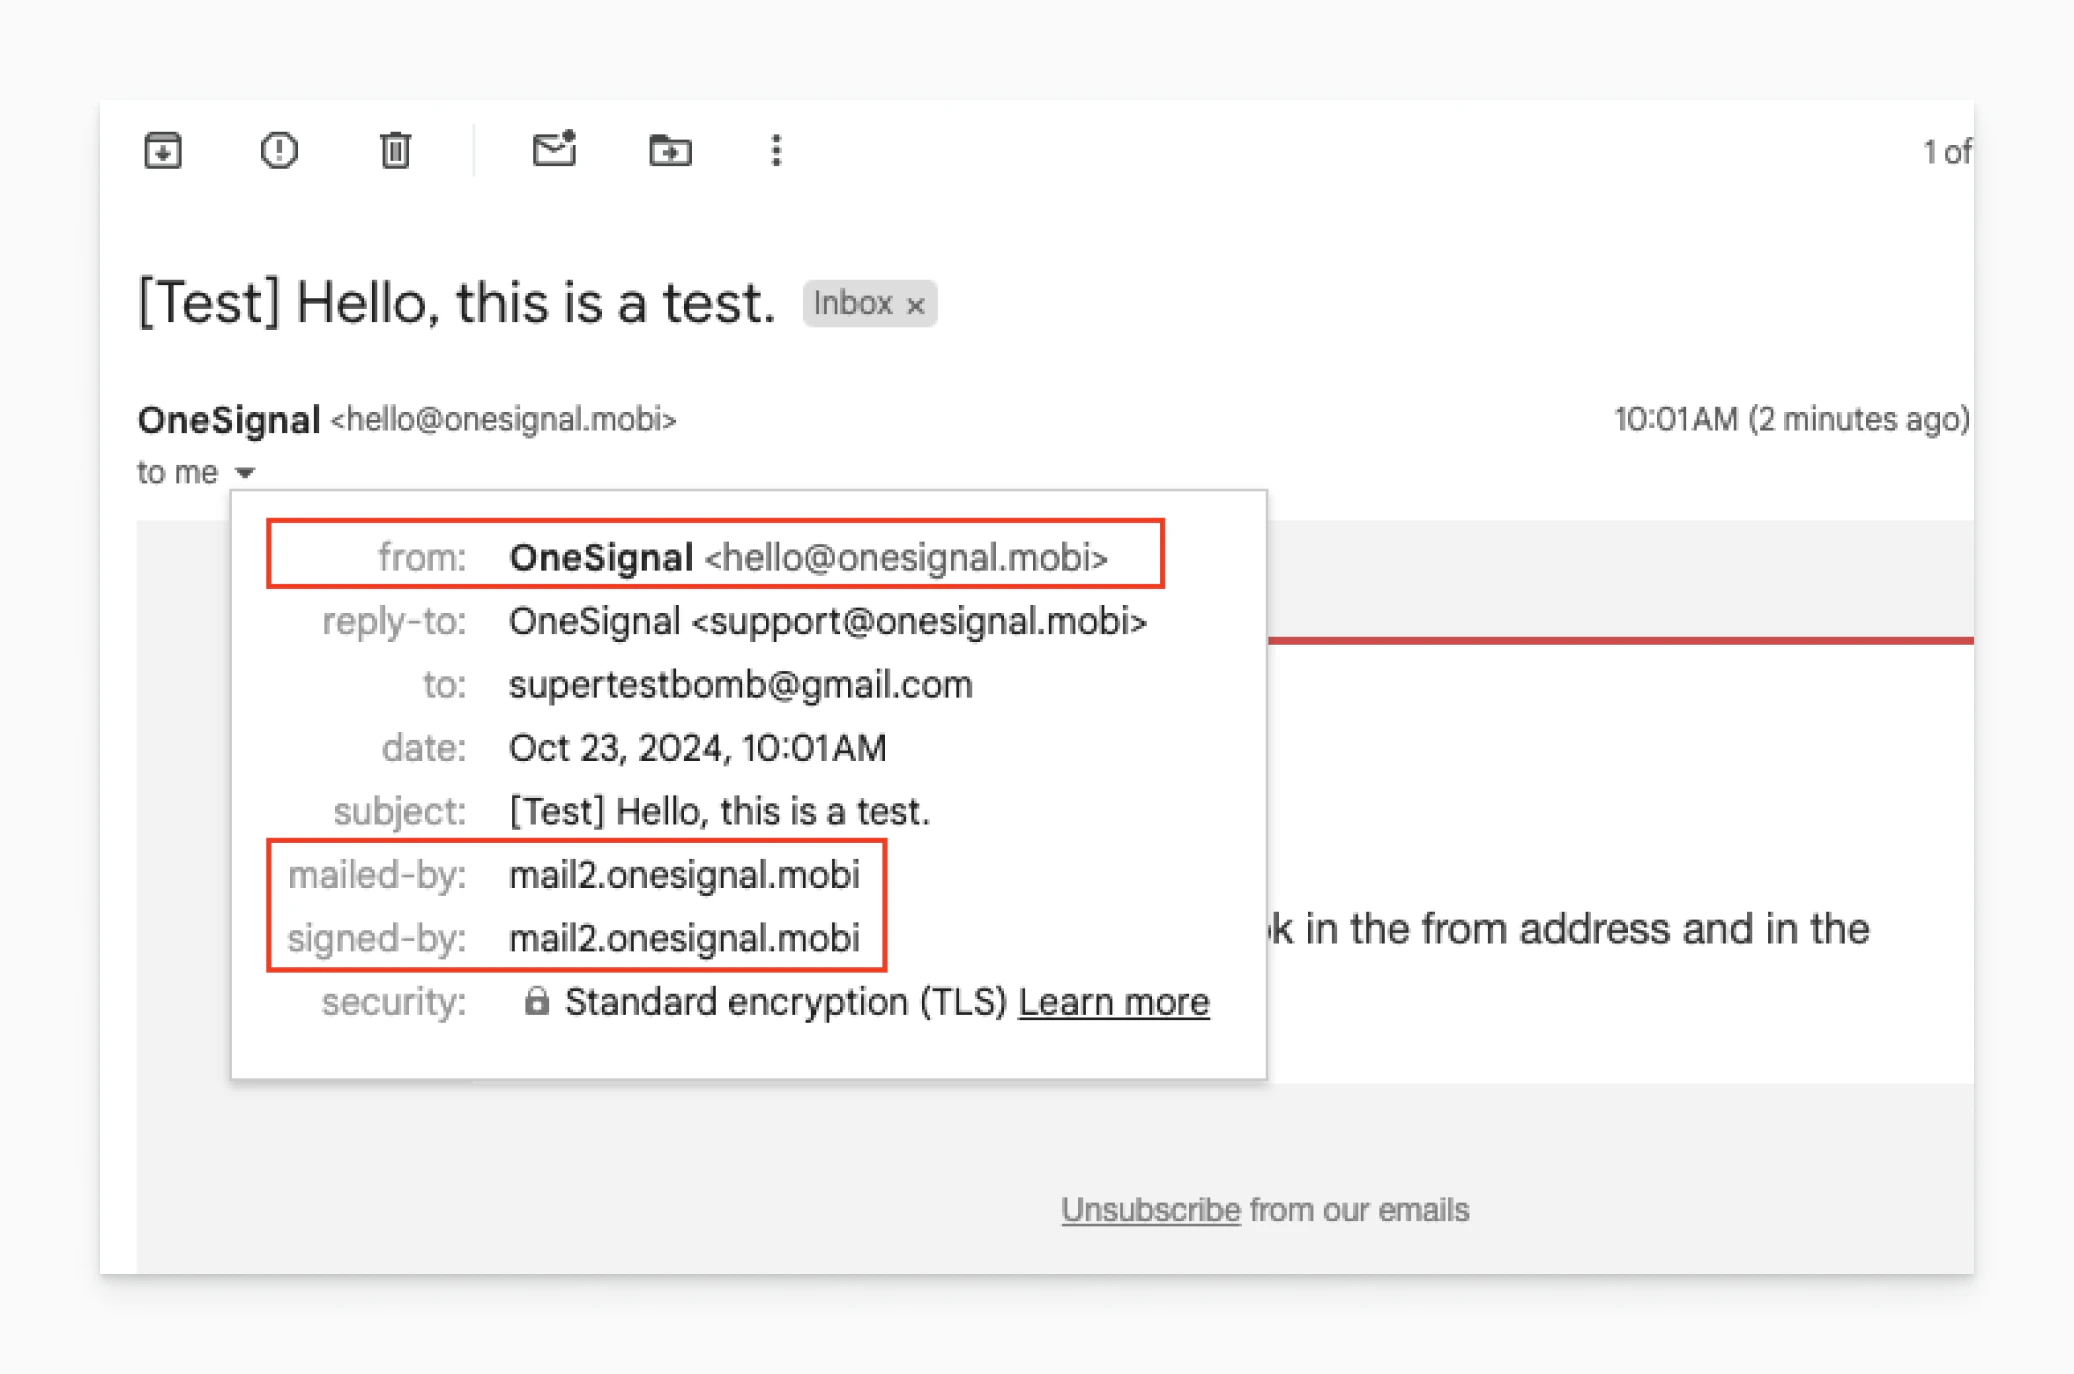
mail.yourdomain.comfor marketingreceipts.yourdomain.comfor transactional
How long does email setup take?
Dashboard configuration (Steps 1–4) typically takes 10–30 minutes. Assuming the account is approved, you can start sending emails to your full audience immediately!Can I send emails before I’m verified?
Before your account is approved, you can send test emails to your own email addresses. Sending to your full audience is enabled only after verification is complete.What if I don’t have access to my DNS settings?
If your registrar is supported, you will see the option to Auto-Configure DNS records. If not, you will need someone with DNS access for your domain — typically a developer, IT admin, or whoever manages your domain registrar — to add the SPF, DKIM, and DMARC records manually. Share the exact values from the OneSignal dashboard with that person. Each record shows a check icon in the OneSignal dashboard once it’s correctly configured.What DNS records are required?
OneSignal requires SPF, DKIM, and DMARC records to authenticate your sending domain. The exact values are shown in the OneSignal dashboard during setup. See Email DNS configuration for details.Can I use an external email provider instead of OneSignal Email?
Yes. OneSignal supports SendGrid, Mailgun, and Mandrill (Mailchimp Transactional) as external providers. Select your provider during the initial setup step. Features like multiple senders, suppression list management, and custom sending domains are only available with OneSignal Email.What happens if my DNS records don’t match?
Emails sent from an unauthenticated domain are more likely to be rejected or filtered to spam by inbox providers. Verify your DNS records in the OneSignal dashboard — a warning icon indicates a mismatch that needs to be resolved.Related pages
Import email list
Import your email list from a CSV file or API.
Email overview
Create and send your first email from the dashboard, Journeys, or the API.
Email reputation best practices
Protect your sender reputation with warm-up strategies, list hygiene, and deliverability monitoring.